This article provides a step-by-step guide as to how a Writer user can quickly and easily write a suitability report recommending the purchase of structured investment product.
1) Select or add the client
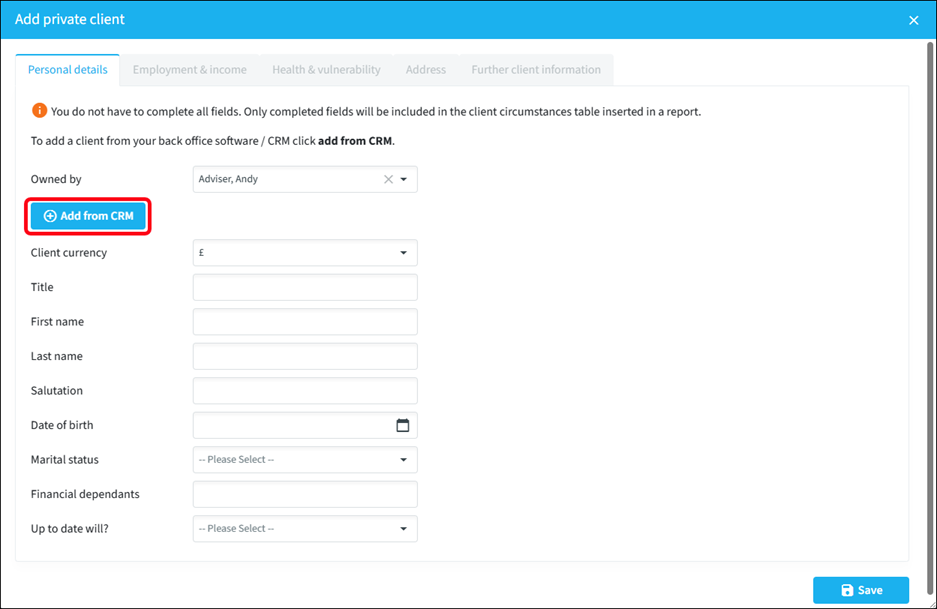
From the Genovo main dashboard, go to Write report and select or create the private client(s) you wish to write the report to. If your Genovo account is integrated with your back office system, remember that you can import the client, rather than adding them manually, by clicking the add from CRM button.
2) Select the Report Creation Method
The preferred report creation method is to use the Genovo AI Assistant (‘Gena’). All you need to do is type, paste or speak a simple advice prompt stating the advice scenario. For this scenario, I’d suggest something like:

Gena will then:
- Determine the most appropriate report type.
- Apply a report name.
- Create the framework of the report.
- Add the required report sections.
- Import the plans from your back office system (if you have a CRM integration), or
- Create a ‘skeleton’ plan ready for you to flesh out as required.
However, in the interests of completeness, this article walks you through the steps of building the report using Genovo’s 'from scratch' report creation method. There are four other report creation methods available, designed to fast-track you through one or more of the steps below and make the report building process even easier.
3) Create the report
In Report Details, give the report a name and select the Report Type - we'd suggest using the Suitability Report.
4) Add the required sections
You’ll now need to add the necessary sections from the 'Available sections' drop down, which in this instance will be:
- New Pension Recommendation, and
- Recommended Investment Strategy.
5) Complete all section wizards
Next, you'll need to step through the section wizards of all sections that require your input, as follows:
5.1) The Introduction section
Progress through the steps of the Introduction section in the usual way. When you reach the Client Objectives step you should select or add the advice option(s) that accurately reflect the client's objective(s) and add comprehensive Know Your Client (KYC) information to ensure you fulfil the regulator’s expectations of you in terms of documenting a client's objectives.
You can use and adapt one of the Genovo advice options, such as:
‘Ensure you are on track and saving enough into your pension to provide you with an annual income of £*INSERT* at your desired retirement age.’
Alternatively, you can add your own advice option if you prefer, or you can manually enter the client’s objectives by typing, pasting in external content, or even just speaking the objectives, by clicking the Add objectives as freetext button.
5.2) The Client Risk Profile section
It's in this section that you will confirm the clients’ attitude to risk and capacity for loss, as well as their knowledge and experience and any investment preferences they may have. Given they’re investing in a structured product, this would be an ideal place to highlight their preference for capital protection.
5.3) New Pension Recommendation section
Simply follow the Wizard section steps in sequence:
5.3.1) Plan Summary
You now need to add the SIPP. If you’re working with an integrated client, click the Add plans from CRM button, otherwise add the plan manually by clicking Add plan.
5.3.2) Why Product Type
On this step where you can select from a number of Advice Reasons to explain why you’ve recommended a SIPP (or of course, you can add your own).
5.3.3) Why Contribution
Use this step to confirm the reasons for the amount and type of any contribution.
5.3.4) Why Provider / Plan
This step is where you’ll confirm why you’re recommending the provider and the specific plan (if the provider offers multiple solutions).
5.3.5) Plan Charges
Enter the plan’s charges, split into Product, Platform, Adviser and Investment Management categories.
You’ll find everything you need to know about the Plan Charges step in this article from the Genovo Knowledge Base.
If you often recommend the same plan from the same provider, you can save time entering charges by using Genovo’s Plan Charges Library feature.
5.3.6) Plan Benefits & Features
This step is where you can explain which benefits and features apply to the recommended plan. For any additional information, use the text box at the bottom of the page.
5.3.7) Key Disadvantages and Tax Implications
Use this step to disclose any disadvantages with the recommendation to take out the SIPP. Any disadvantages associated with using a structured product within the revised investment strategy can be covered off in the ‘why investment strategy’ step of the Recommended Investment Strategy section (see below).
5.3.8) Other solutions
This an optional step where you highlight any other products or solutions that you have considered and the reasons why you have discounted them. If you don’t enter any figures into this step, the Other Solutions subsection won’t be included in your report.
5.4) The Recommended Investment Strategy section
5.4.1) Recommended Investment Strategy
An investment strategy in Genovo can include cash, individual equities, funds, portfolios, bonds, ETFs, investment trusts etc. For SIPPs, it can extend to any permissible investment – commercial property, physical bullion, fine art, etc, plus of course, structured products.
So – rather than add the structured product as a recommendation in the New Investment Recommendation section as shown in Part 1 of this blog mini-series , it can be covered as part of the recommended investment strategy.
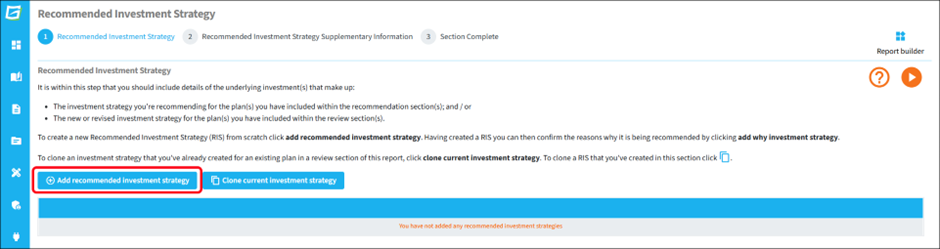
Firstly, click Add recommended investment strategy
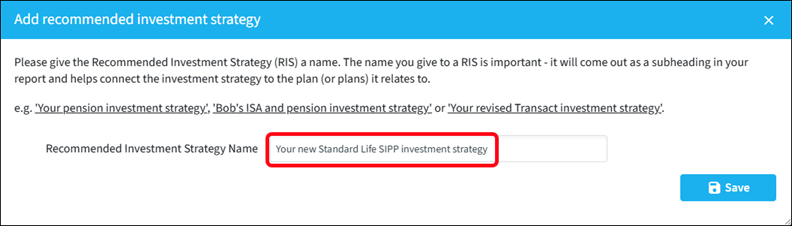
Next, you’ll need to give the new investment strategy a name, for example:
You now need to add the underlying investments that make up the investment strategy. You can add an investment manually (by clicking Add new investment), but for Structured Products it’s far easier to add the investment from the Investment Library. To do this, click on the Add library investment button:
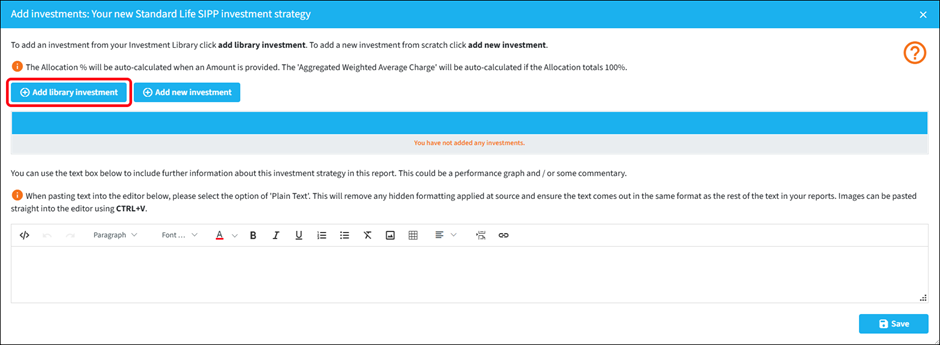
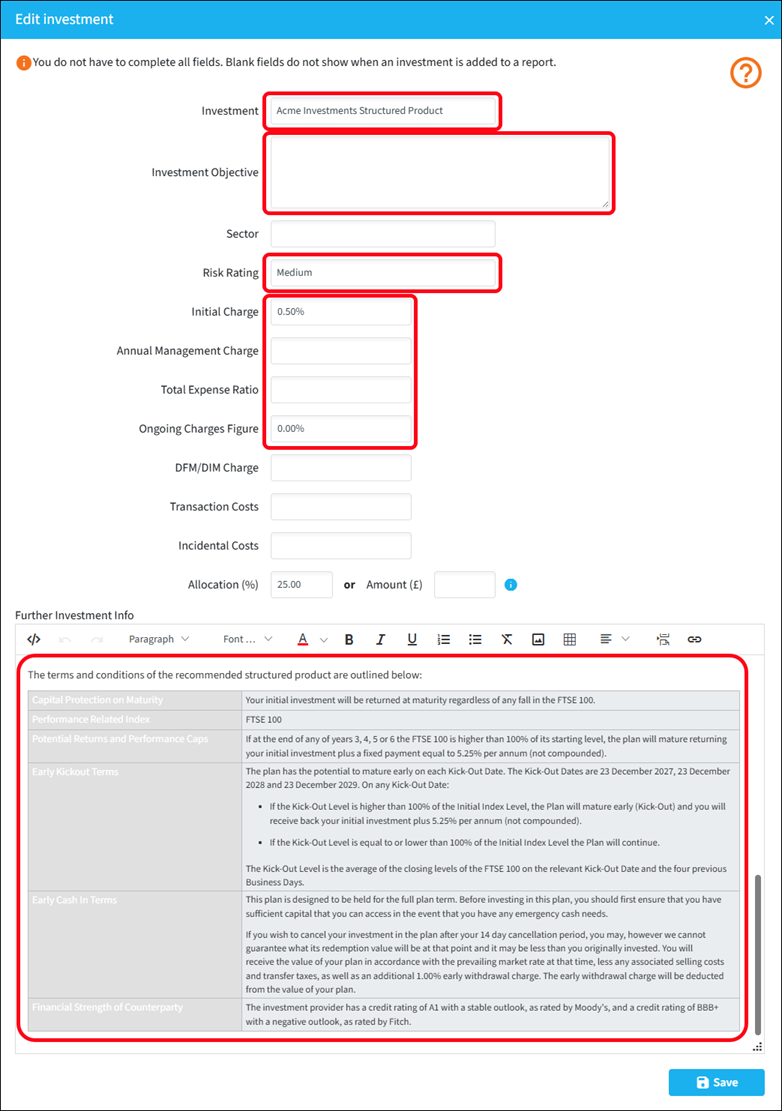
This is where you’ll add the structured investment product as part of the investment strategy.
The quickest and easiest way is to re-use the Genovo Example Structured Product from the Investment Library. This example structured product includes a table of the various features and benefits of a typical structured product, so all you have to do is edit the various fields (including the investment name, obviously). this is much easier than creating it from scratch.
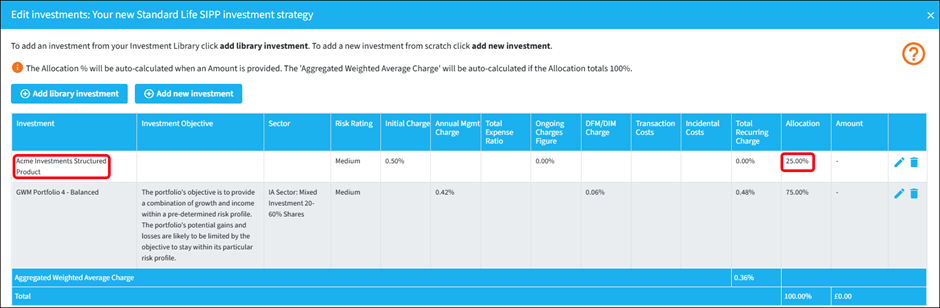
If the investment strategy is not the only investment in the plan’s investment strategy, you should now add the other investments too. It might look something like this very simple example:
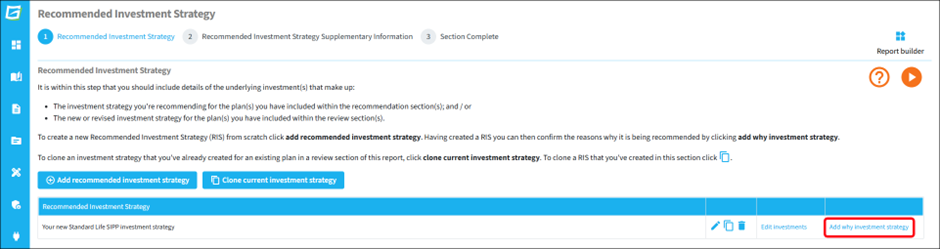
Finally, don’t forget the Why investment strategy step. It’s here that you should explain how the recommended investment strategy meets the client’s objectives.
5.4.2) Recommended Investment Strategy Supplementary Information
This optional step allows you to select one or more options to include additional content in your report about your firm’s advice proposition, ESG investing, discretionary fund management, etc.
6) The Important Information section
This is the last wizard section you'll need to complete and the steps are self-explanatory.
7) Tailor the structure of the report
Having completed all the section wizards you should then tailor the structure of your report by unchecking any sections you do not wish to include in your report; and then change the sort order of any sections to reflect your personal preferences.
You’ll find more information about how to remove sections from your report here.
You'll find more information about how to reorder the sections in your report here.
8) Create and edit the report
Having created the framework of the report of the report with 98%+ of the content already included as an initial draft in the Report Builder, both Writer and Reader users can then make any final tweaks to the content of the draft report in the Report Editor. To open and edit the report in the Report Editor click Create / Edit report.
Report template
Having created the report, you may then wish to convert it into a template and save it to your Report Template Libraryto use as a starting point for creating future reports.